

Tutorials:
Photoshop Method
Download the photoshop templates first of all.
Shield Creation
Step 1: Get an image of what you want to make a flag or shield out of:

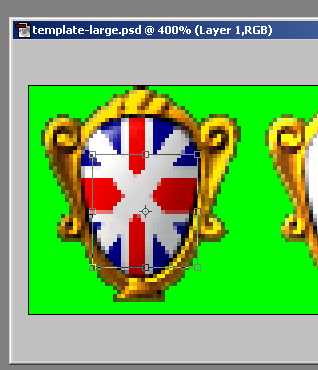
Step 2: Copy and paste the image into the template-large.psd, and drag it down to the bottom of the layer stack.
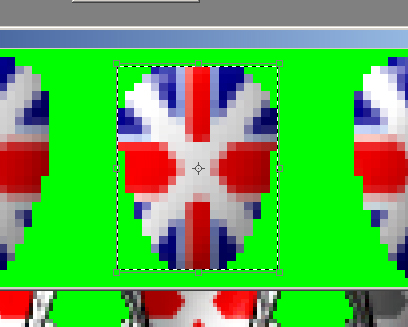
Step 3: Resize it by pressing control-T and drag the control points around till it fits inside the shield "window" nicely.
Step 4: Select the Marquee tool
 and drag a box around the first shield window area.
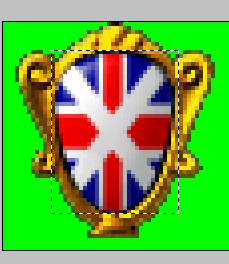
Make sure the bottom layer with your graphics is selected!

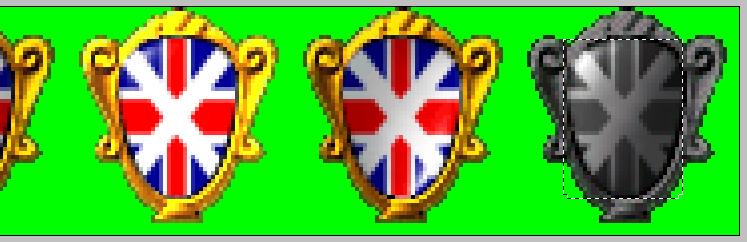
Step 5: while the Marquee tool is still selected, hold down ctrl-alt and drag the graphics to the same spot under the other 3 shield.
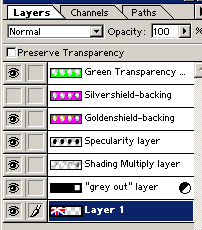
Step 6: Save your template, and save a copy as shield_XXX (XXX being the country code you want to make the shield for.) hide the goldenshield layer and unhide the silvershield layer.
Save another copy as silvershield_XXX.
Step 7: Copy the graphics you still have marqueed, and paste into the template-small.psd. Again drag the graphics to the bottom of the layer stack, move under the first shield and resize it so it looks right.

Step 8: Like in steps 4 and 5, marquee the small shield and drag it over the second, and fourth shield, THEN drag it over the third shield, and resize it so it looks right on the smaller of the small shields.
Step 9: Save your template, and save a copy as smallshield_XXX. You are now done, celebrate in your own personal manner.
Flag Creation
Step 1: Get a flag from somewhere, MAKE SURE it has 2:3 proportions (100 height, 150 width is good) and MAKE SURE you set it to RGB color by typing alt-i-m-r. MAKE SURE the file displace.psd is on your desktop (this is important).
Now window-show actions and click the actions options button
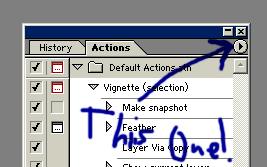
select load actions and load the flags.atn that came with the zip.
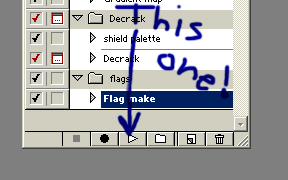
now open the flag template, THEN open your flag (this is important) then click run action!
Save! and save a copy as flag_XXX (XXX being the country for which you made it)
The flag window will be too small to show everything, so before you run the action, set the background colour to the main color of your flag, and go image-canvas size, for 130 percent for height and width. Unless your flag is crosses and stripes (england, scotland etc) in that case you don't want to do this.
With horizontal tricolours (France, Italy, etc), you want to make the middle stripe a lot thinner, so on the flag graphic go image-convas size 130 percent, and fill in the sides the right colours, and then go image-image size turn off constrain proportions, and set height to 130 percent, then run the action.
Unfortunately because of the nature of the way I did this, this will only work well with flags that have no HORISONTAL stripes, flags like the Netherlands or Hungary or modern Russia will look... weird. Flags like Italy or France will work fine. With flags that are mostly one colour with detail in the middle though, this will work great!
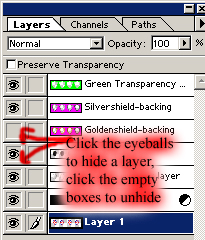
For vertical tricolours you CAN however use the NEW functionality of the three stripe adjustment layers I added in for making flags like modern Russia, the Netherlands, Germany etc. click the eyeball next to it to activate the layer, and click the divided black/white circle to edit it. Change the hue to change the color, and saturation to lower/raise the intensity, and brightness to make it lighter or darker.
3D Method
You need the following to make your own flags and shields with my stuff:
3dsmax 4.0 or greater
Photoshop 5.0 or greater or equivalent
Animation Shop 3 (optional)
First of all download the scenes . then download bases and flags and unzip their contents directly to your desktop. They MUST be unzipped right into your desktop since that is where the scenes load them from. From here you can drag and drop flag textures onto the shield and flag meshes, and render them. You might need some extra goodies
If your flag is non-rectangular, you need to make an additional map for the opacity. Look at the flag for Bukhara to see how this is done.
Once rendered, you need to open them in photoshop or whatever, and assemble them all together. the flags are assembled simply enough, 1 to 25. To make things easier on yourself, set a snap-to grid 36 pixels wide. Once you are finished assembling them, save to indexed colour and use the flag palette. (if you don't know how to get this, it's in the extra goodies)
The shields are assembled 1, 10, 20, 30 for shield_, 40, 50, 60, 70 for silvershield_. TO 'grey out' 30 and 70, marquee the shield and alt-click the pink area with the magic wand to deselect that area. Then select image->adjust->hue/saturation and set saturation to -100. Set to indexed colour, and use the shields palette (if you don't know how to get this, it's in the extra goodies)
For the small shield, use the first for the first and last, and the second for the second and third image. Grey out the last image with the above method, and save with the shield palette. To make it look right, copy a background transparency of an existing smallshield_ and paste over the shields to get the right edge. (there's a small shield base in the extra goodies) turn off contiguous and select all the pink, copy, select your small shield image, paste.